Monday, June 21, 2010

Wharram Tiki 38 Relaunched in Hawaii

Almost two years ago I had the good fortune to be doing some yacht work at Bay Ship and Yacht
in the San Fransisco Bay. This was especially cool because this was the time that Beat Rettamund and Beatriz Restrepo were launching there Tiki 38 catamaran "Aluna". Over the several course of the several months that we were working there I was able to visit with Beat and Beatriz and even attend the launching party and go on some sails. Lucky man am I.Last year they left the Bay area and sailed to Hawaii. After spending some time stocking the kitty, spreading and absorbing good energy and battling the man ,they have relaunched "Aluna" and have departed for the Southern Pacific. I am here still working and quite envious of them. They are really nice folks and if you happen to see them out there, say Hi .

Monday, June 14, 2010

Wharram Tiki 38 Catamarans For Sale

This first boat appears to me to be a very clean example of a well built Tiki 38. It is ready to go in Ottawa Canada. The photos show a nice finish and good equipment. I believe he is asking around $80,000 for the boat. I expect it will have new owners soon
The Tiki 38 is one James Wharram Designs mos popular cruising designs.


This next boat is in the UK and is only partially complete. This would be a huge start to someone. This is the only photo I have seen so it is hard to judge build quality. The owner states the boat is %75 complete. I think that this is not really very accurate. He is asking $15,00 BSP or best offer.
With a tall container and some good packing I believe you could get it into one container. This would cost about $3,000 to Miami. This would not count packing.

Monday, June 7, 2010

Speedboat and Genuine Risk

I really look forward to working in Cracker Boy Boat Works in Riviera Beach, FL as there are usually some cool raceboats there. I have shown some pics of Speedboat in the past. They were rigging both Speedboat and Genuine Risk. These are awesome machines.

This mast is worth more than most sailboats in the world. Five sets of spreaders, all carbon and synthetic lines, wow.
These boats have canting keels which can be levered outto windward for an immense righting force.
One of the reasons these boats come to Cracker Boy is that there is sufficient water here. This boat draws 18'.

Just barely fits into the slip for the travel lift.
There is a lot of work going on now prepping the boat to go north for this years Bermuda race and to be ready for another attempt at a trans Atlantic attempt.
I will follow with another post with some very cool photos that I snagged off the internet.

Monday, February 15, 2010

Reuel Parkers Ibis is Launched

Saint Valentines Day 2010. Seems like a pretty good day to launch the new boat from Parker Marine. It's being launched at Riverside Marine in Fort Pierce FL. It's colder than normal but a small crowd is gathered for the occasion. Reuel called me earlier this week and said that it would go in today and I made sure I could be here. the boat had been moved over to where the travel lift could pick it up and was hanging over the keel/centerboard prior to installing the board.

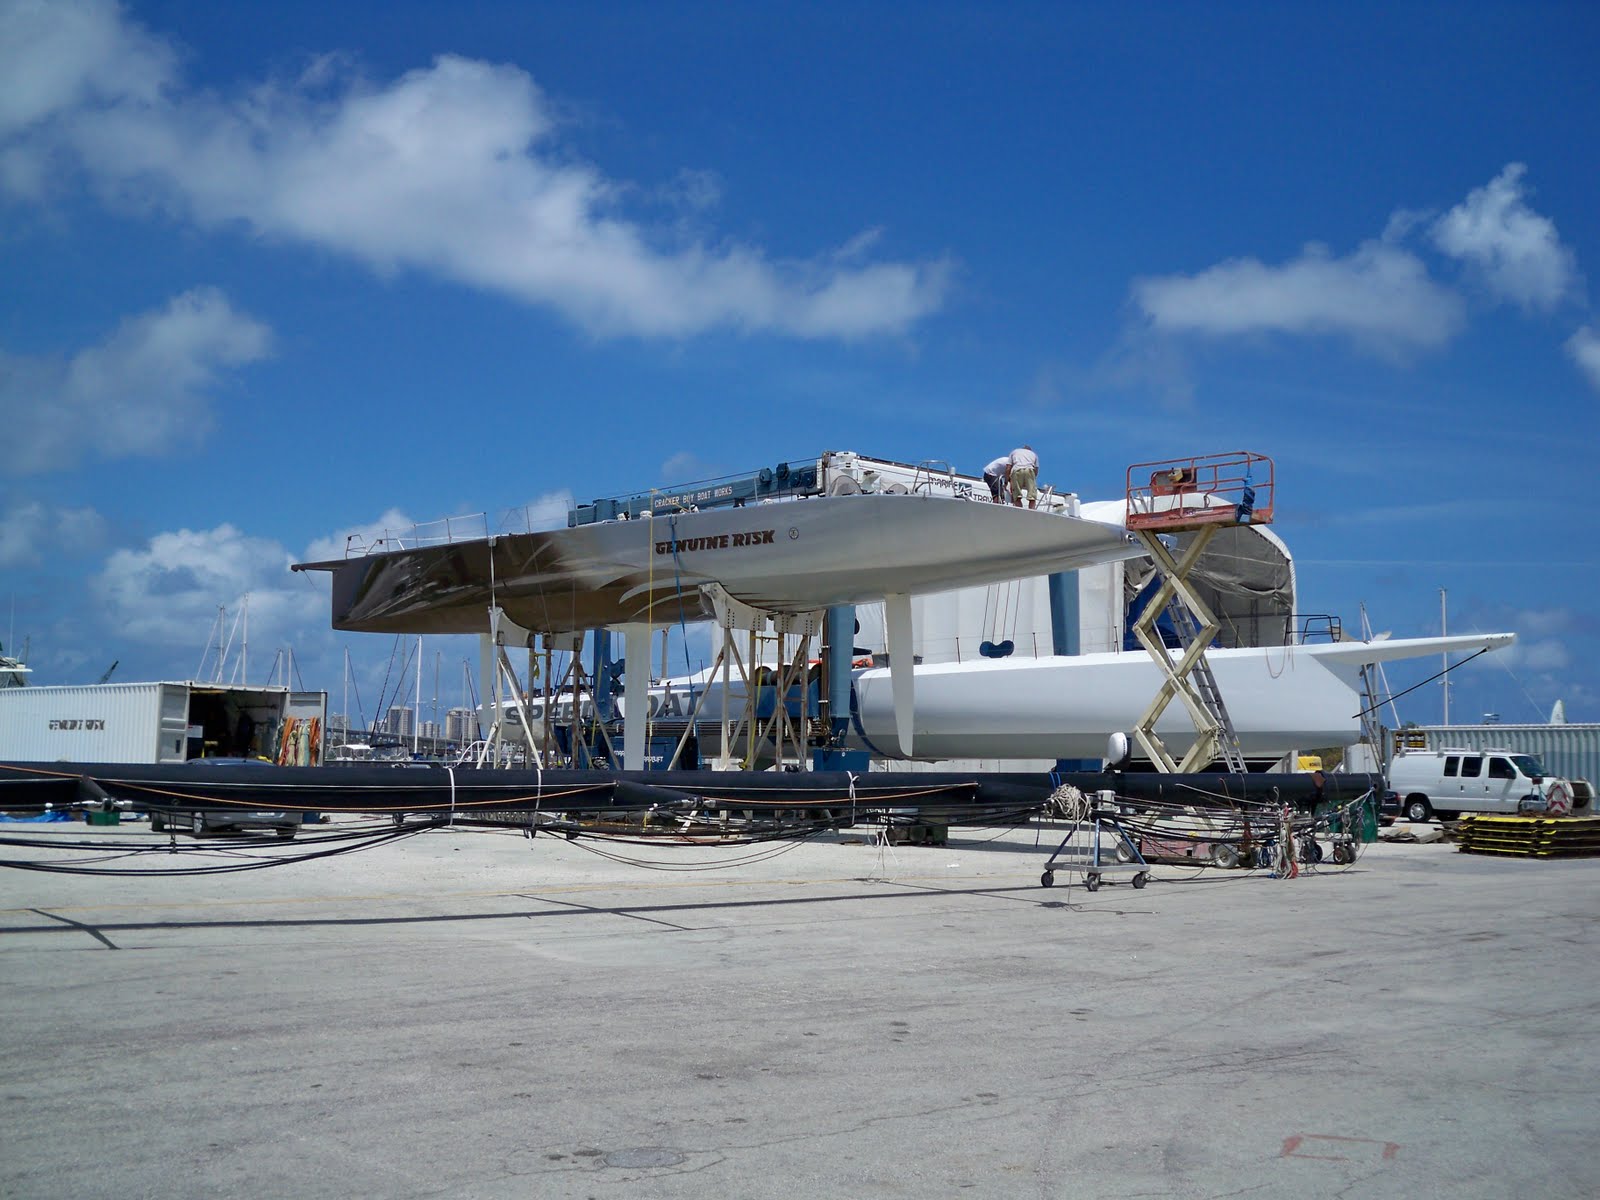
Both masts are hooked up and rigged ready for raising.

This shot shows the butt of the main mast and the main tabernacle. Also visible are the pin rails and the vent for the fresh water tank as well as halyards and lazy jacks. You can clearly see the birds mouth construction of the mast here.

Here is the fore mast tabernacle and the electric winch which will serve to raise the masts and also to control the centerboard. There is still some weather proofing of the winch to come.

A view of the winch and its' control pendant from the aft side. This was my position for about an hour and a half while the boat was lowered down and the centerboard was jacked/pulled up into the trunk. Up a little ,no too much, no a little more, fwd the boat, back the boat ,up,down.....
Here is a view of the board ready to go in. This board is fabricated of ten gauge steel filled with lead. When it is fully down it is the shape of a fin keel foil, when up the boat has 30" draft.

Everyone finally had there tongue on the right side of their mouth and the deed was done. A little bottom paint over the pivot shaft retaining plates and ready to go.

The board is about 1/2 down at this point.

Here the skeg and rudder are visible. The rudder is balanced for better control with a lighter helm and an end plate for better flow.

Here goes.
Sitting in the slings checking everything out. I took some video of this and will try and put it on You Tube later.

Very pretty.
Floating nicely on her lines. There is still several hundred pounds of trim ballast to go in.

Firing off the engine for sea trials.

I was happy to go along for the first trip out into the ICW to check things out. That's Reuel at the helm.

The happy skipper.
Cruising along at about 8 knots, very little wake.

Amy, who has been doing varnish and paint and upholstery and....... This view is from the cockpit into the aft cabin.
Port side aft over the reefer.

Moving forward, the cooker.
Further forward, a cabinet over the galley sink.

The sink itself.

Cabinet below the sink and the aft end of the centerboard trunk.

Above the forward end of the starboard dinette are book shelves.

The dinette table.
The starboard aft end of the cabin.

The engine lives under the cockpit sole and behind the companionway steps.


Our escort vessel for the excursion.

Into the slip where she will be completed in the coming weeks. I will update in a few days when I get to go for a sail. YES

Wednesday, December 30, 2009

Progress On the Tiki 8ms

I have been very busy here lately and have a lot of photos of the Tiki 8m in progress.They aren't all in exact order but will illustrate the process. The companionway hatches are right and left handed, unfortunately we only got the mold for the port hull. We will have to build a mold for the starboard side. This photo shows the hatch mold with gelcoat applied.


The masts have been delivered to us and are ready to be stepped and rigged.

This hole is for the forestay bridle.

These are the beam lashing cleats. We have over-drilled the bolt holes and packed them with high density filler and glass fibers. These bolts go through the hull/deck joint.

Below are the beam locating blocks. they are made of Coosa board. This is a high density polyurethane foam reinforced with fiberglass fibers.

Here you can see we have prepped the deck areas where the beam locating blocks will be bonded.

Here the blocks have been glued down to the deck. We used epoxy to attach these blocks for it's superior strength and secondary bonding characteristics. After the epoxy kicks we will fillet the blocks into the deck with polyester putty and gelcoat. Then we will sand and polish them for a smooth finish.

We built these beams from divinycell foam and unidirectional glass fibers and carbon fabric.
Below you can see the flange that will support the cockpit. We have also started to build the brackets to support the jib winches.

Where ever hardware is attached to these beams we must "pot" the fastener. This entails overdrilling the fastener and filling the area with a mixture of hi-density filler and glass fibers.
The pots for the mast step bolts are visible here.

This photo shows the winch brackets and the pots for the mainsheet traveller track and the cockpit support flanges.

In this shot we are gluing the beam locating blocks onto the bottom of the beams. First we had to align and level the hulls.Then we put thin spacers in place to achieve the desired clearance. Then we apply epoxy and clamp the beams in place and clean up the squeeze-out.

Now we can lash the beams in place. We are launching this boat in an incomplete state so that we can verify everything is just so before final paint. These two boats have been modified from the original design in several ways and we want to be sure that everything works perfectly for our customer.

One of the modifications required is that the boat must maneuver in reverse under power in tight quarters.This is not one of the Tiki's strong points. In order to accomplish this we have removed the skegs and are fabricating kick-up rudders. This will enable us to size the rudder for adequate turning force and allow us to put some counterbalance area forward of the rudder shaft. This is much more complicated than the stock rudder design but is what our client requires. Here we are working on the upper end of the rudders. One of the lower blades is visible on the bench under the grinders.

These rudder parts are built of Coosa board and then sheathed with carbon fiber.

The upper parts of the rudders, the cases, are drilled for the lashings. These are potted just like holes for hardware.

Here we are using pvc pipe as a form for the tiller receivers.

We are using a square and a level to drill the holes in the stern post for the rudder lashings.


These holes go through solid glass and don't need potting. The are painted with gelcoat to seal them and are then sanded and polished.

Here the rudders have been lashed on and a blade has been inserted.
Here we are gluing in the gussets under the deck below where the mast beam is attached. These gussets will help prevent wracking from the mast loads. Under the aft beam attachment is a structural bulkhead that provides support.

Here we are gluing in the ash staving for cabin ceiling.You just can't have too many clamps.

We have made some teak ladders for cabin access.

In the meantime we have also been working on the cockpit.

In addition to the normal cockpit these boats have an aft station for the captain. Here is a view of this part upside down in progress.

We have now added glass to the bottom of the captain's station.

Here is the topside view of the captain's station showing the foot well and the pots for mounting bolts.

In this photo we have just glued the window into the frame. We use Sikaflex for this. The small blocks are super glued to the paper film on the acrylic to hold it in place while the first application of Sika dries. In the morning we will remove the blocks and top off the Sika and tool it for a nice smooth finish.


We have now brought the boat to our local municipal ramp for launching and sea trials.

Here she goes!


Around the corner to the beach and up with the mast and on with the sails.

We have some adjustments to make but she moves along nicely and we are very pleased.